Knit the World Together ~ Knit Stars 5.0 Earlybird Enrollment is open.

How are you feeling with all this extra time at home? Are you knitting more? Wishing you could be face-to-face with your friends, family and your knitting community? 

The Knit Stars crew has done it again! The online workshops begin in October, but for a short time now through May 3 you can register as an earlybird at a discount.

Imagine registering for a knitting festival, and scoring a seat in ALL TEN of these amazing teachers’ classes…

Åsa Söderman
Francoise Danoy
Gayle Roehm. (I know Gayle personally, and she is a gem! Her expertise is Japanese knitting patterns and stitches.)
Gaye “GG” Glasspie
Jacqueline Cieslak
Meri Tanaka, Amirisu Magazine
Tatiana Sarasa
Tian Connaughton
Tina Tse
Yumiko Alexander

Now imagine that you OWN the classes, so you don’t have to try to retain everything you learn. You can just enjoy them on your own schedule and at your own pace, knowing you can refer to them again and again.

https://www.knitstars.com/a/4441/2hiCoD4A

Knit Stars Season 5 Earlybird tickets are now available, along with previous seasons, at the lowest price we’ve ever offered. And you can watch any previous seasons right now! You can save up to $100 by joining by May 3.

  1. Due to the global crisis, Knit Stars is offering their lowest Earlybird pricing ever – just $179 (will go up to $229 next time it’s offered, in the fall)
  2. Pricing on previous seasons is also $179 during this window. So if you buy Season 5 + a previous season, you’re saving $100. (My season was 3.0.)

Again, read all about it here: https://www.knitstars.com/a/4441/2hiCoD4A

On a personal note, please know how much I appreciate Knit Stars and your participation. They continue to be very generous with all their alumni, and by using the link here, they will share some of any of your purchases with me, something I really appreciate as much of my teaching has ground to a halt.

Stay safe, stay home, and enjoy this online experience.

third hand for stranded color work- – new product review

Remember the first time you tried stranded color work? How did you decide to hold two strands of yarn? Until now your options have been two in the right hand, two in the left hand, one in each hand, or two in the left hand using one of those index finger clamps or scary wire springs.

What do you really need? A third hand of course!

It’s just what we needed. What took the industry so  long to figure this out?

Apologies for the hands. Yesterday was a great gardening day in Seattle.


#STITCHESWest #FeelingCraftsy


These are two hashtags to watch if you are heading to the Santa Clara Convention Center this weekend for Stitches West- #STITCHESWest #FeelingCraftsy

I’ll be teaching eight classes (phew!!) and I look forward to seeing you. I have some openings in those classes and just printed extra handouts for you in case you can make it. Check it out.

On Saturday, February 24, starting at 12:30 please come visit me in the Craftsy booth #936 and 938 for a continental knitting demo. And join the Facebook group “Knitting and Crochet Makers” to follow along with the fun. I just finished taping my fourth Craftsy class, which is still under wraps for now, but here are my other classes currently available.

Craftsy is also hosting a Craftsy Unlimited Experience with Craftsy instructors in the same booths Saturday at 4:30. I’ll still be in class but will try to pop in there for a few minutes before the evening Stitches Student Banquet.

Are you missing out on all the fun this time? Are you on the other side of the country? Then maybe you can make it to Stitches United in Hartford next month.

See you soon!

something for everyone

Come to Hartford for Stitches United! Whether you yourself have many stitching interests, or you have buddies you like to travel with who knit, sew, crochet, quilt, weave, dye, and more, Stitches United is where you’ll want to be. I’ll be teaching. Check it out. Click on the image to see my classes and information on the entire event:

things our mothers made

image

Once in a while my knitting group gets together and has a themed party. For example, last year we gathered to overdye our previous yarn purchases in the colorway “What-the-hell-was-I-thinking?” – you know the color.  Those with expertise share it, and we all benefit.

Our most recent gathering was themed “Things our mothers (or fathers, aunts, uncles…) made.” It was a time for meaningful, and sometimes silly, memories. We all share an appreciation for the memories of our family members making things, and we are glad that as makers of things, we continue the tradition.

image

Michale’s doll clothes.

image

April’s sweater, quilt, and wire jewelry.

image

Arlene’s crocheted coat her mom made, lined of course.

image

We also enjoyed this spectacular view of the day’s changing weather over Lake Washington.

image image

Arlene’s crocheted piece. We were not sure if it was a bed or table cover, but its border went round all four sides, so we think tablecloth.

image

April’s sweater (above) and quilt (below).

image

IMG_0214

Pat, wearing her own newly finished sweater, and holding an afghan.  Her mom taught her to knit left handed and how to rip and fix mistakes.  Mac the cat was on the lookout for loose ends.

image

Carolyn’s wicked sharp can opener and crocheted hanger.

image

Michale’s mom’s painted ceramic duck, with a broken and re-glued neck (above).  Her quilt is below.

image image

Arlene and Carolyn holding Michale’s doll dresses with lined bodices.

image

Jacqueline’s granny square blanket and Kaffe Fassett vest.

image image

Mary’s crewel embroidery was so charming! And below is a doll made from grandma’s embroidered pillow cases.

image

image

My mom made my sweater for me when I was in high school, and it was similar to one Arlene had purchased years back.

image

And I made friends with Mac.

image

Susan was not able to share as her treasures are all in a moving pod, but she did offer sound advice.  We need to record these stories, pen to paper, and store them with the treasures so future family members can know their value.


sewing on buttons

This cardigan gets nine buttons. A tenth is sewn inside for insurance against future loss. I want them done right so they don’t pull on the button band. I’m ready with buttons for the public side, clear buttons for the inside, sewing needles that fit through the button holes, a nice sharp scissors that will do double duty later, and yarn to sew with (I’ve split my four-ply in half).

IMG_7029

IMG_7031

IMG_7032

I like to use safety pins to work out the button placement first. See where the pin goes in and out of the fabric? That’s where I aim my sewing needle.

IMG_7033

IMG_7035

If I were to snug these layers as I sewed, there would not be enough room for the bottoned-on layer to exist without getting squished, so I use a little lazy trick.

IMG_7036

IMG_7039

My scissor handles get closed around the button to preserve some space to make a shank.

IMG_7041

Now I sew on the button through all the layers.

IMG_7042

Remove the scissors. Wind yarn around to make a shank. Darn in ends. Repeat.

IMG_7043

Ready for the next one.

IMG_7046

(This design uses vertically stranded color work for contrasting lines of bobbles in a lace cardigan. I am still writing the pattern and working out the sizes. It will be called “Skagit Valley” cardigan when it is ready for public consumption. I love the way the yoke and neck worked out, but I am not letting you see that yet.)


join me at Craftsy.com!

Craftsy course

Click on this link here to attend class. New: On 2/10 I updated the link. If you have found me here, you should get a discount to class! Click for a 50% off link which means the course will cost you $15.

Less strain + more efficiency = more knitting. Whether or not math is your forté, this is an equation sure to catch any knitter’s eye. If your knitting has ever been cut short by achy hands and wrists, or if you find yourself yearning for speedier stitching, join me, instructor Lorilee Beltman, for my online Craftsy class, Knit Faster with Continental Knitting, to learn a different style of knitting that increases comfort and bolsters efficiency!

When it comes to Continental Knitting there’s only one overarching rule: fewer motions mean more efficiency. During class, learn which motions have the greatest impact on stitch gauge to size knit and purl stitches equally and achieve even tension. You’ll give each finger a job, minimizing hand motions so that your knitting will become faster, more comfortable and more efficient! Whether you’re new to knitting, or seasoned in English-Style, you’ll be happy you took this big step.

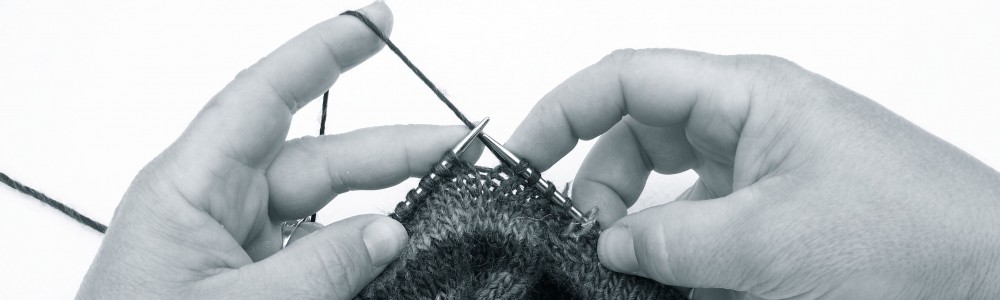
For our first lesson, we’ll focus on the knit stitch — Continental style. Learn how to tension and position yarn in your hands to make knit stitches flow effortlessly across your needles, then move on to the purl stitch. I’ll show you how to hold your yarn and move it into place so that your needle grabs quickly and easily, and we’ll work to keep awkward movements at a minimum, making sure your stitches are correctly oriented on your needles.

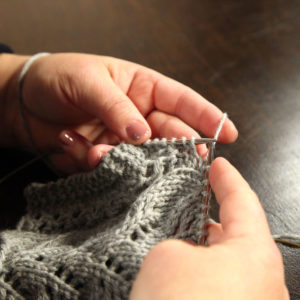
Depending on your stitches, you might notice that your knitting is too tight or too loose. In our third lesson, I’ll show you how this happens and explain how to get those stitches just right. At this point, you’ve likely gotten an idea of how Continental Knitting increases your efficiency, but it’s with techniques that require frequent stitch alternation where the value of this style really shines. As we talk about ribbing and seed stitch, you’ll see that getting working yarn to the back or front of your knitting is simply a matter of shifting your right hand!

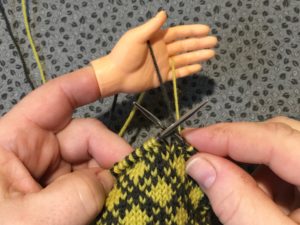
Next, we’ll walk through basic increases, decreases and other stitch maneuvers you need as you find out just how easy elaborate patterns become when you’re holding your yarn in the left hand. That’s why lefties especially will love Continental Knitting! Then, whether your favorite fabric has cables, colorwork or beyond, you’ll learn how to tackle each. Just try not to get too excited when you see how much easier Linen Stitch and colorwork can be — we’ve still got one lesson to go!

For our final lesson you’ll face an inevitable truth: the way you’re holding your yarn might be causing you pain. I’ll give you tips to keep in mind so you can avoid pitfalls and pain, and troubleshoot why you may have trouble keeping tension and stitches even. We’ll end on an inspiring note, and run over some small, fun projects with which you can put your exciting new skills to use! Learn how to rejuvenate your knitting and ditch stitching strain when you sign up for Knit Faster with Continental Knitting today!

Over the years, I’ve found that venturing into something new can really pay off! If you’re looking to try your hand at Continental Knitting, then rest assured that I’ll do everything I can to help, because one of my greatest passions is helping students embrace their creative curiosities and push past their obstacles! It’s this affection for knitters drove me to own and operate my own business, City Knitting, from 2005 to 2009. Now, I’m so lucky to have the opportunity to focus on instruction, and help knitters get the knowledge they need to flourish!

Luckily for both of us, Craftsy is as dedicated to getting rid of those educational roadblocks as I am. In fact, Craftsy makes education easy, with classes that you can watch anytime, anywhere, as you enjoy lifetime access to personalized support!

So what are you waiting for? Hurt less, knit faster and finish projects with smooth, even tension. You’ll soon realize that efficient knitting is exciting knitting!


empty nest with a silver lining

Which type of person are you: clutter or anti-clutter?

I need some of each. I like my living space to have interesting personal things in it, but in general I’m happier with little clutter. Too much clutter and pattern in my living space tends to stress me out.

Throw this all out the window when it comes to creative spaces. Many of us, whether in the yarn business for work or as a hobby, have claimed a room in the house as our own craft room. For work I need this. And I need this space to be very cluttered- needles in view, a bulletin board full of random inspirations, needle gauges, notes, business cards. I want to see all my books. See them on a shelf. Gardening books. Art books. (Art books used to be my luxury purchase in college since I didn’t have the properly shaped feet to support a shoe habit.) Knitting books. My swift and ball winder need a permanent home ready to be used on a whim.

I don’t need to see all my yarn, class samples, and finished knits. I know, what’s wrong with me? So those are in cabinets behind closed doors.

Now a year-and-a-half ago we moved across the country to a house 1/3 the size of our Michigan home. Major purge. But the house did have a room for me to eventually claim as my own. With all three kids out of the house grown up working or in college, I finally got to claim my silver lining to our newly emptied nest. A week ago I painted and started moving in. It’s feeling great. I’m only half done, half-organized, but I am getting there.  I may share pictures here when ready.

In the meantime I leave my handy friends with one great tip. This project has involved a trip (okay, two trips) to Ikea and lots of assembly and affixing things to walls. Partway in, when I realized I don’t have to power I used to have to hold that drill firmly when pushing screws into studs in the wall, I reached for the bar soap. Each screw gets a little roll in the soap before gliding into the wall like buttah!

trouble-shooting my video set up

Normally I teach with a video camera focused on my hands. The projector I connect it to projects large hands onto the screen behind me, so students can see a close-up of techniques. All of us are on the same page at the same time. I can still be facing the students and talking to them. I love it.

This past weekend at Stitches East, a disaster struck and I had to do some trouble shooting. (By the way, this post is meant to be potentially helpful to other teachers. The rest of you will find it a big yawn.) My Canon videocamera broke. No tears were shed, but my heart sank. I’d like to share what ended up working in its place, with a few enhancements I only had time to figure out once I got home.

First off, a big thank you to Hartford resident and Stitches student Marna, who saved me with, “Hey, here’s my number. I drive by Best Buy on the way to Stitches, and if you find anything there that will help you, let me swing by and pick it up for you.” I did, and she did.

Following is my big-hands-in-motion materials list:

  • (From the event venue- make sure you have a power strip, cart, and a screen. The power strip gives juice to your phone and the projector. The rest is up to you.)
  • A stand, or a tripod with an arm. It’s best if the thing fits in your suitcase, can rest on a table, and can hold your smartphone about 18 -24 inches above the tabletop, aimed straight down. I have a dress form stand instead of a tripod. I leave the body at home stuffed in a closet and take just the stand. Its three legs lay flat on the table, out of the way. The hemline tool, which swings out and around, is what I use to attach my phone.
  • Two tiny adorable little bungie cords. One firmly attaches my phone to the arm. The other collects the cords up and out of the way.
  • iPhone. I have a 5. Settings to use: set camera app to video (not camera) | light set to ON, which illuminates your hands below | hold finger on screen to lock the focus (This I only discovered now. At the show it kept autofocusing, annoying us all.) And don’t reverse the camera or your students get a nice view of the ceiling or perhaps up your nose. Zoom in close enough for folks to see, then find the perimeter of the area of the table you must stay in to not have your hands drift out of view. Put sticky notes on the table to mark your work zone.
  • Adapter. For me, I got the Apple174 Lighting to HDMI adapter. Model MD826ZM/A purchased from Best Buy. One end into your phone. The adapter end has HDMI and, a happy surprise, another lightning port so I could keep my phone plugged in as I worked using the phone’s charging cord. Plug it into the power strip. It was only eight inches long though, so I also needed a
  • HDMI – HDMI cord about 40 inches long. This was my “extension cord” to reach the HDMI port on my projector.
  • Projector. This year I bought a ViewSonic PJD5134. I plug it in. I plug in the HDMI cord from the phone (could also use VGA, so look into that.) Not all projectors have HDMI ports. Use the settings to select HDMI as the source. You can adjust kerning. Adjust focus. And, also discovered only now, I can adjust the zoom to fill the screen instead of pulling the table further back from the screen as I did this weekend. Duh.

To my students who put up with me as I figured this out- thanks for your patience. Next week I’ll be using it at Vogue Live Chicago as well. To any teachers who want to check it out, ask when we meet at events, or find me in class.

I would have taken a picture of the whole setup for you, but my iPhone was otherwise occupied. Protip- also bring something else to tell time.